
How to Instantly Improve Your Tide Pool Photography Part 1: Smart Phones

Tide pool photography is one of the easiest ways to get images of marine life without snorkeling or scuba diving. The amount of diversity and density of life in healthy tide pools is beyond most other marine environments and you won’t have any trouble finding animals to take pictures of. But tide pool photography also presents unique challenges compared to other marine photography.
Many tide pool visitors may not have fancy underwater or DSLR cameras to take pictures with, but that’s ok! You can still take stunning photos with the camera that’s already in your pocket: your smart phone. Tide pool photography on your smart phone can be really rewarding if you know a couple tips to help you out. Here are five ways to instantly improve your tide pool photography on your smart phone.
- 1. Fight the Glare
- 2. Get Low and Get Close
- 3. Find the Big and Colorful
- 4. Put Your Phone Underwater (if you’re willing…)
- 5. Do Some Editing
1. Fight the Glare
Your number one struggle when taking photos at the tide pools with a smart phone is glare. Glare at the tide pools is caused by the reflection of sunlight on the surface of the water; not only can it be very bright and hurt your eyes to look at but it often obstructs your view into the water as you see the reflection of the sky instead.
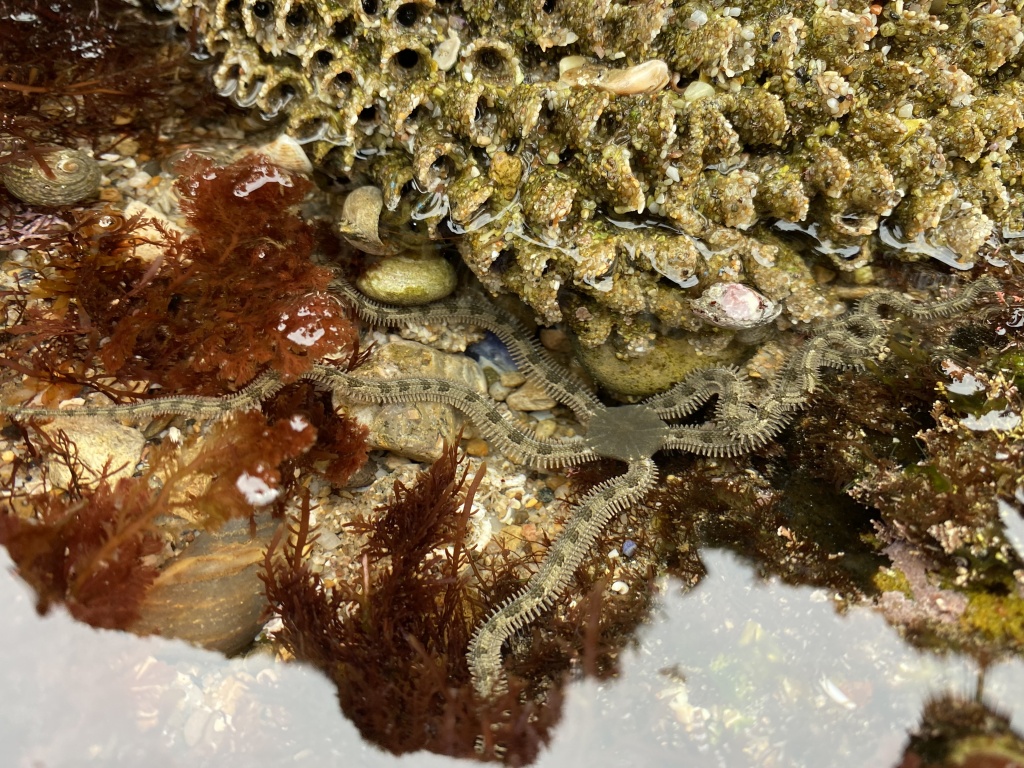
In the above photo, you can see where the glare begins near the bottom of the photo. The contrast decreases and everything under the water looks gray and less vibrant.
Cameras do not have as wide of a dynamic range as human eyes do, which is a fancy way of saying that you can see more contrast than your camera can. So even if you are able see the sea star crawling along the rocks, your phone camera may not be able to.
Smart phone cameras have come a long way in the past five years, but even so, fighting the water’s reflective surface at the tide pools can be tricky. On a DSLR camera, you can use a polarizer to help you out, but you don’t have this option with a smart phone. However, there are ways that you can fight the glare and keep it mostly out of your photos.
The easiest way to fight the glare is to block it out completely. You’ll find that you can’t block glare with your shadow, as the light is still reflecting into your eyes (or camera lens) from another angle. Instead, you have to make the surface of the water reflect a dark object— like your hand or phone— instead of the sky by getting right on top of it. Then, you can crop the photo afterward to only include on the section that doesn’t have glare.
This may sound complicated, but it’s very easy to tell when you’re blocking the glare and when you aren’t. Positioning your phone directly above your subject will typically do the trick.

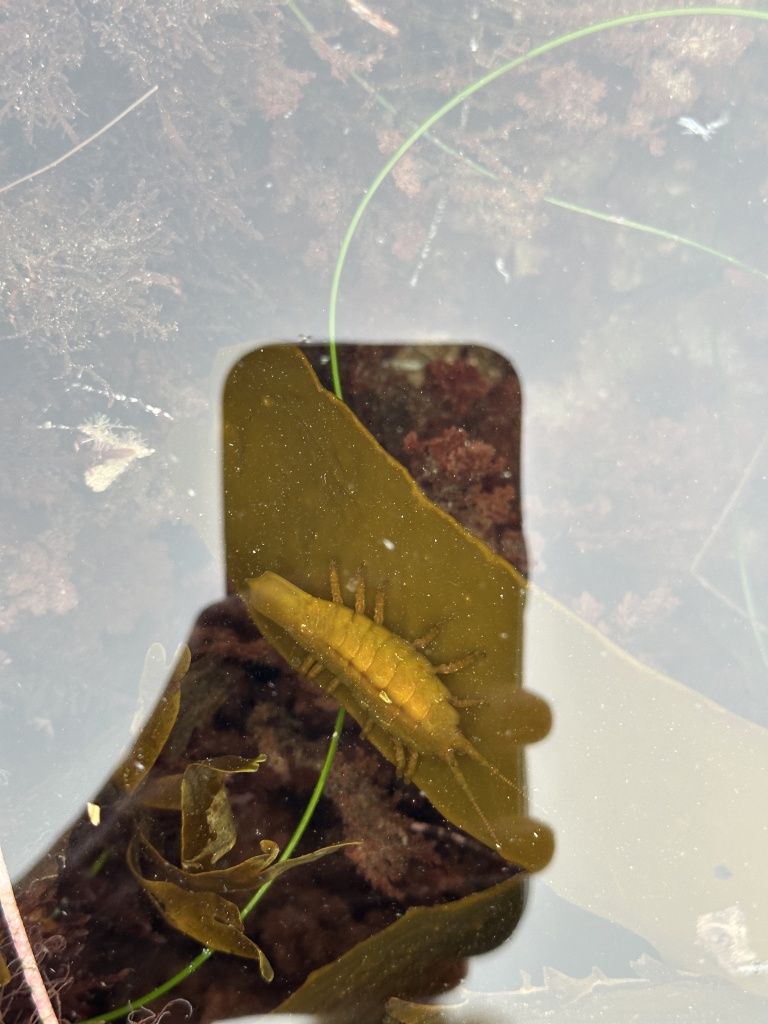
Seaweed Isopod (Pentidotea stenops)
In these two photos, you can really see the difference blocking out the glare makes. In the photo on the left, the reflection of the sky is obscuring what’s beneath the water. In the photo on the right, you can see the outline of my hand and phone held directly above the subject to block the glare.
Of course, blocking out the glare this way limits what angle you can use, but it’s often worth it in smart phone photography. You can also combat the glare with editing, but we’ll talk more about that later.
2. Get Low and Get Close
Taking identification photos at the tide pools is great, but taking artistic photos that pop and catch the eye is a different matter. There are a variety of ways to experiment with your shots, but one of the best ways to do this at the tide pools is to get low and/or get close.
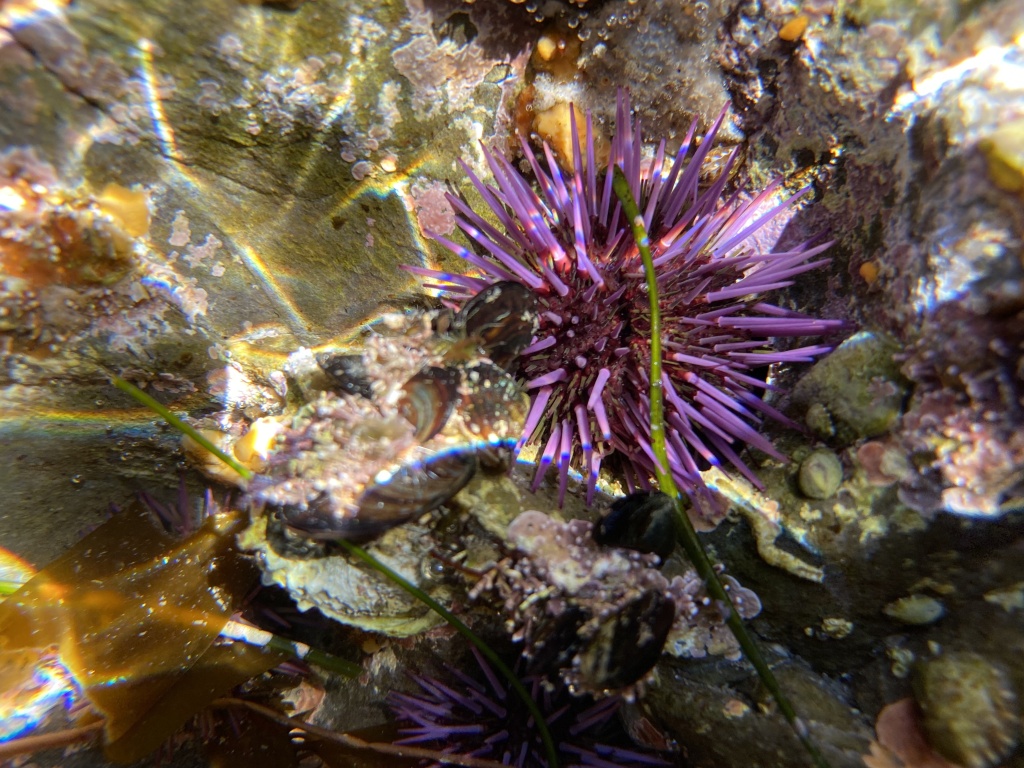
Getting low allows you one fantastic advantage: capturing creatures above and below the water at the same time. By putting your phone near the water’s surface you can show what’s under the water while still capturing the scene above. Here is an example of this kind of shot.
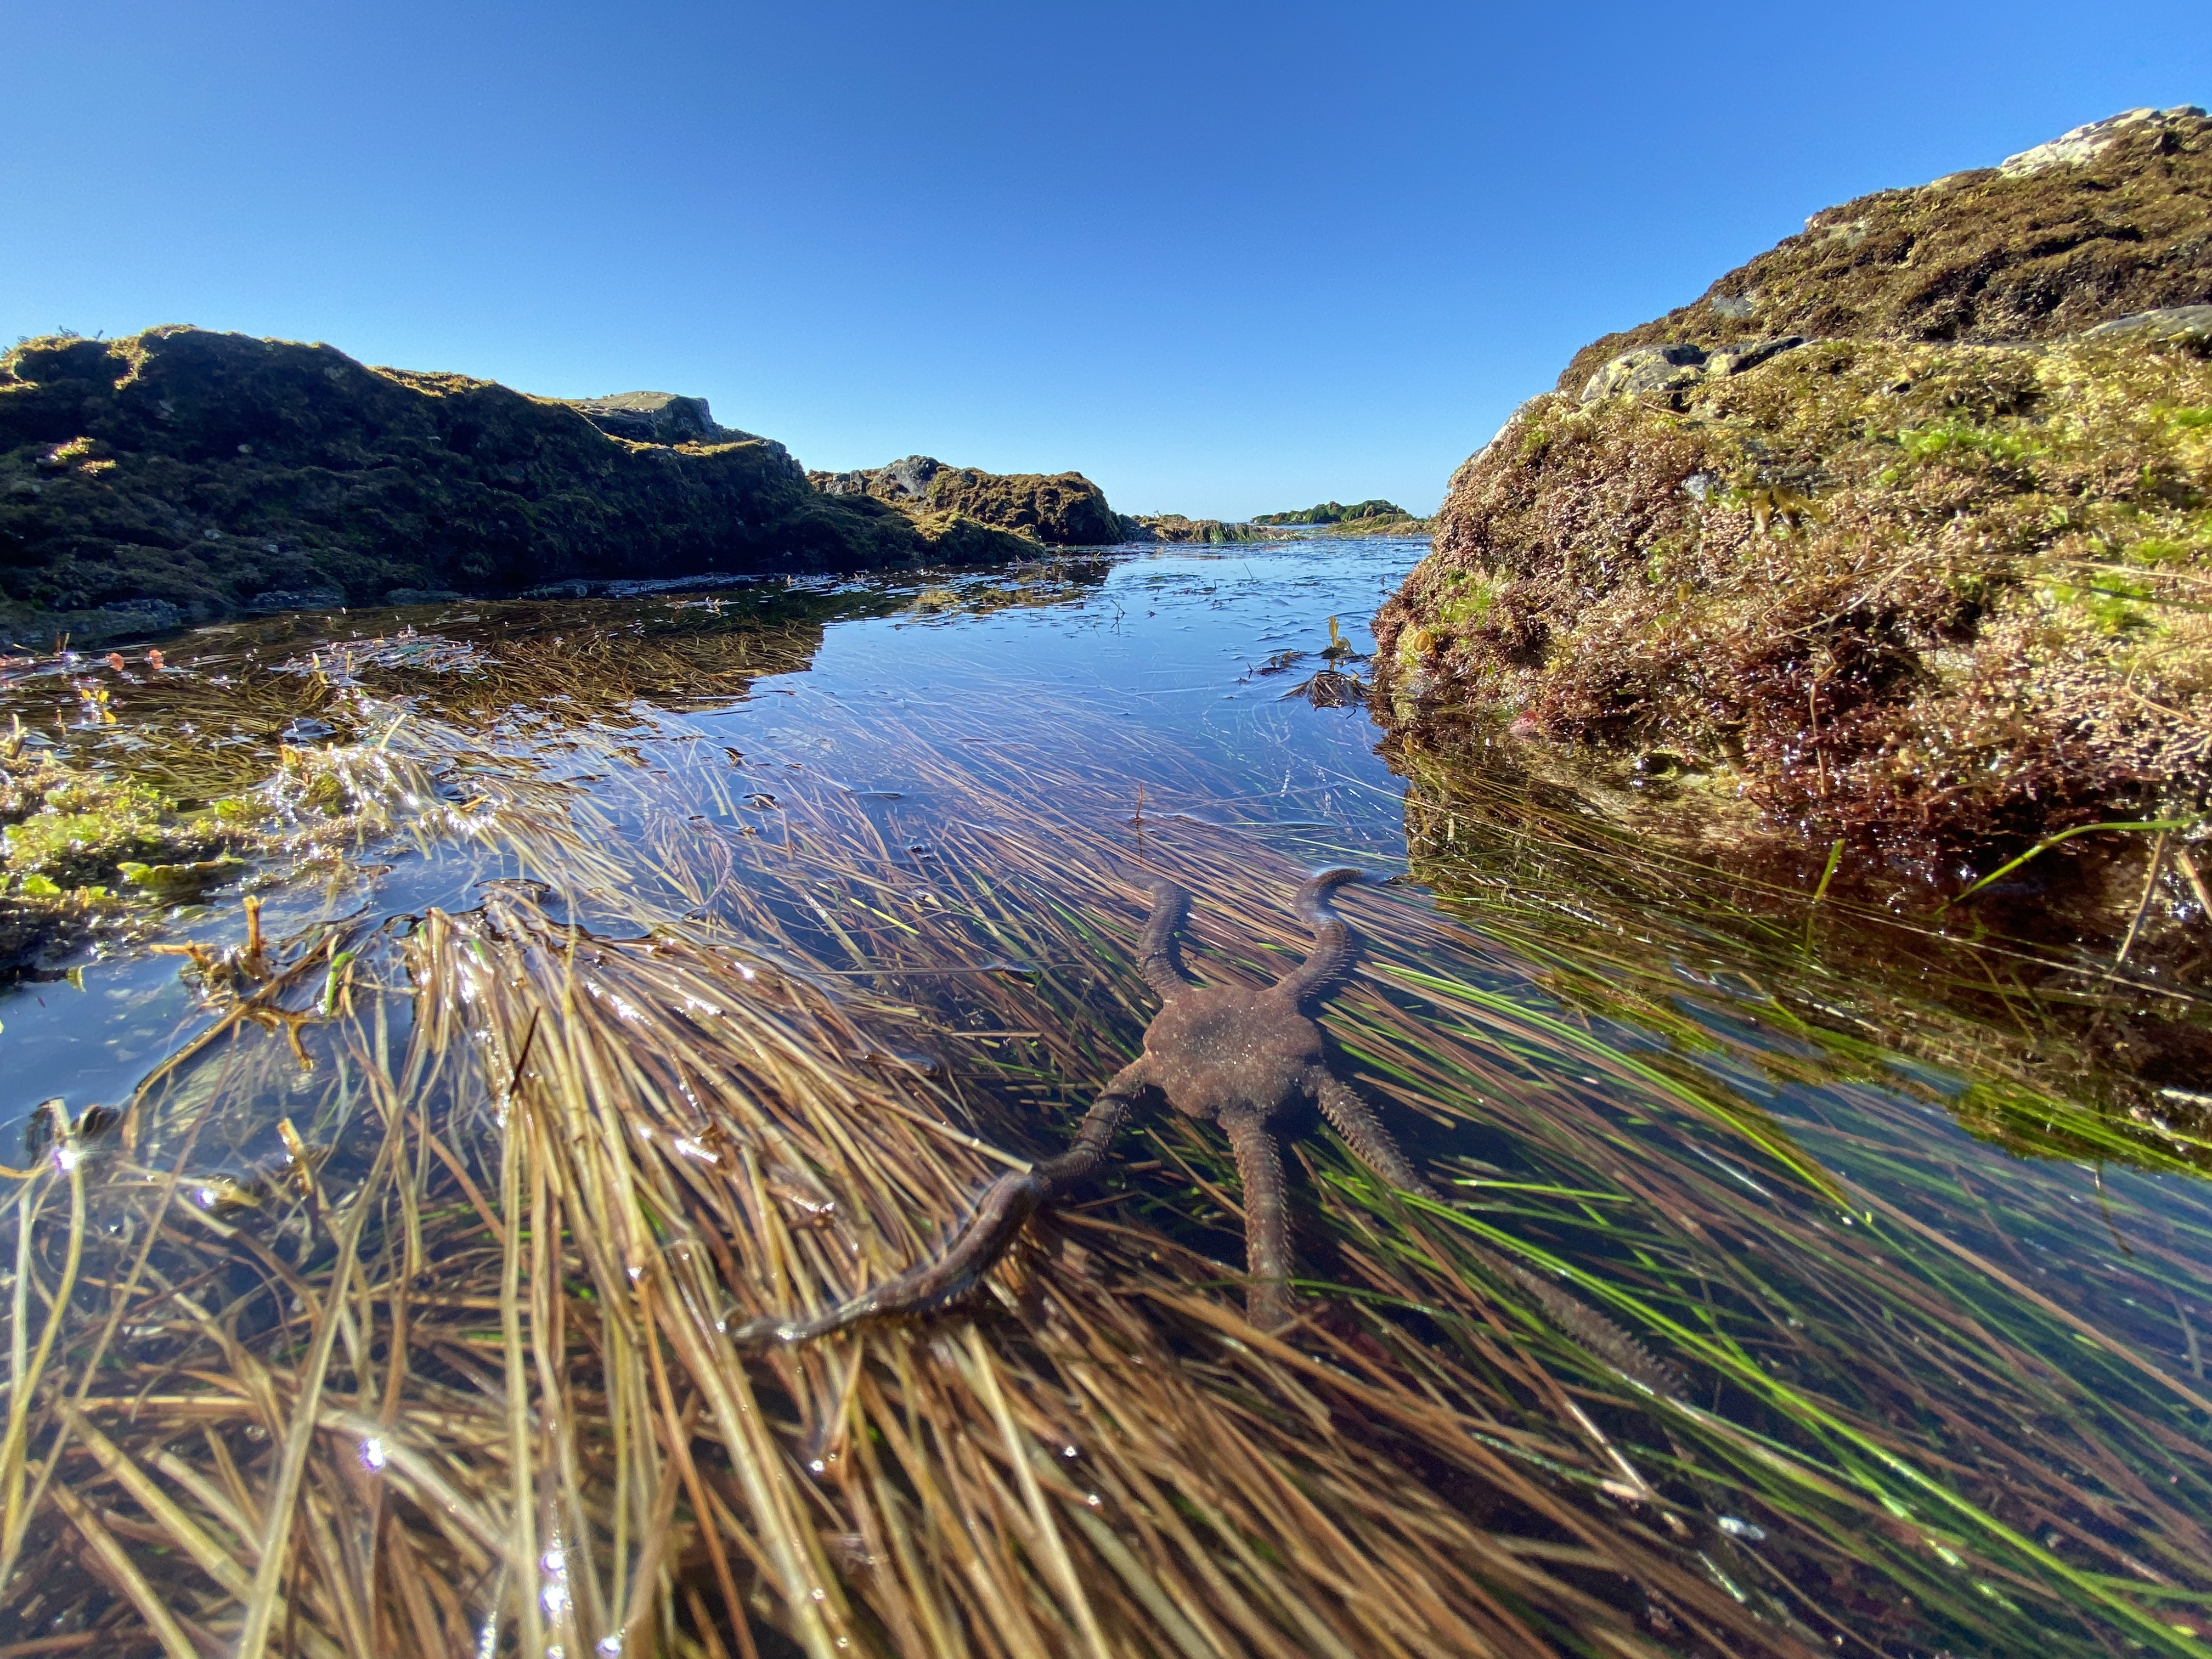
Even though this image has some glare, the reflection adds to the image as you can both see the Panama serpent star under the water and the rocks and sky above.
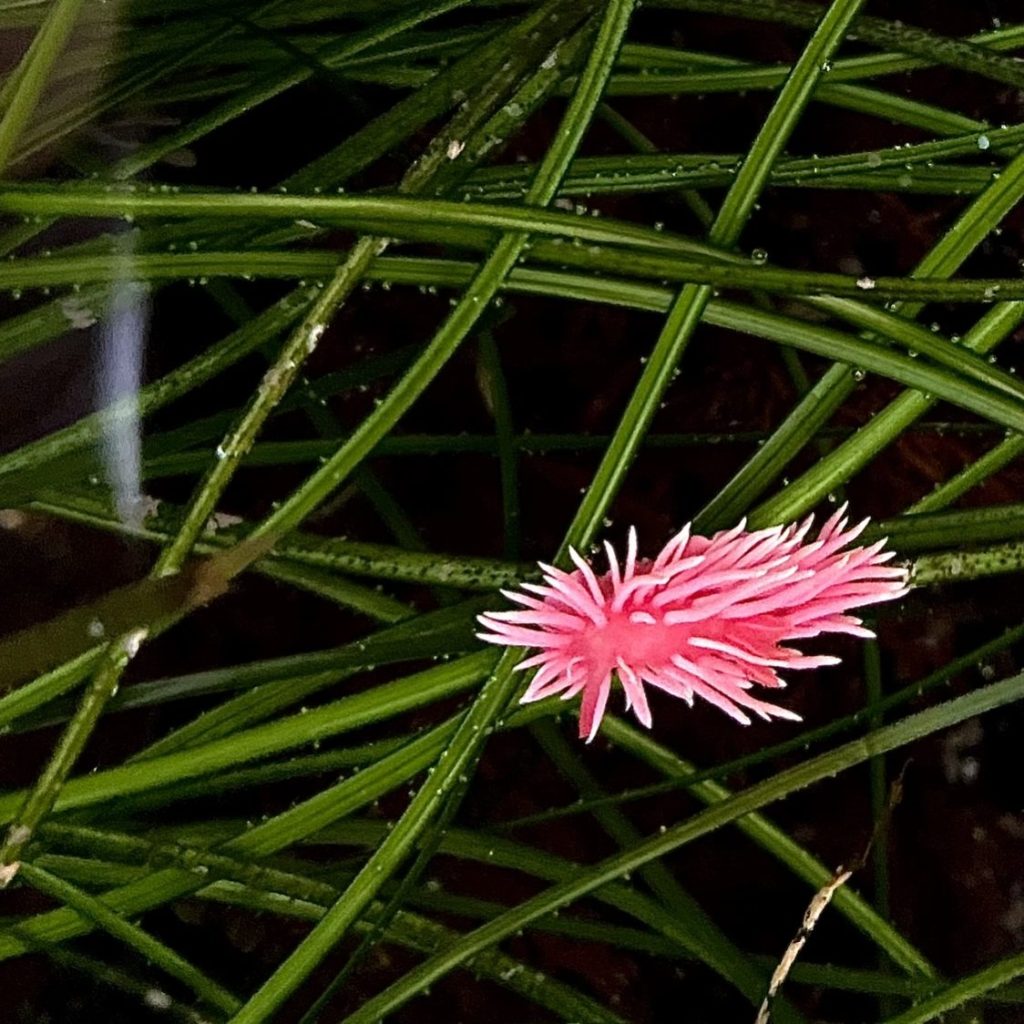
If you want to take stunning images of the animals at the tide pools, chances are you are going to have to get close. Besides some large sea stars, anemones, and the occasional large octopus, most tide pools animals you will see are rather small and you will need to get close for the subject of your photo to be clear.
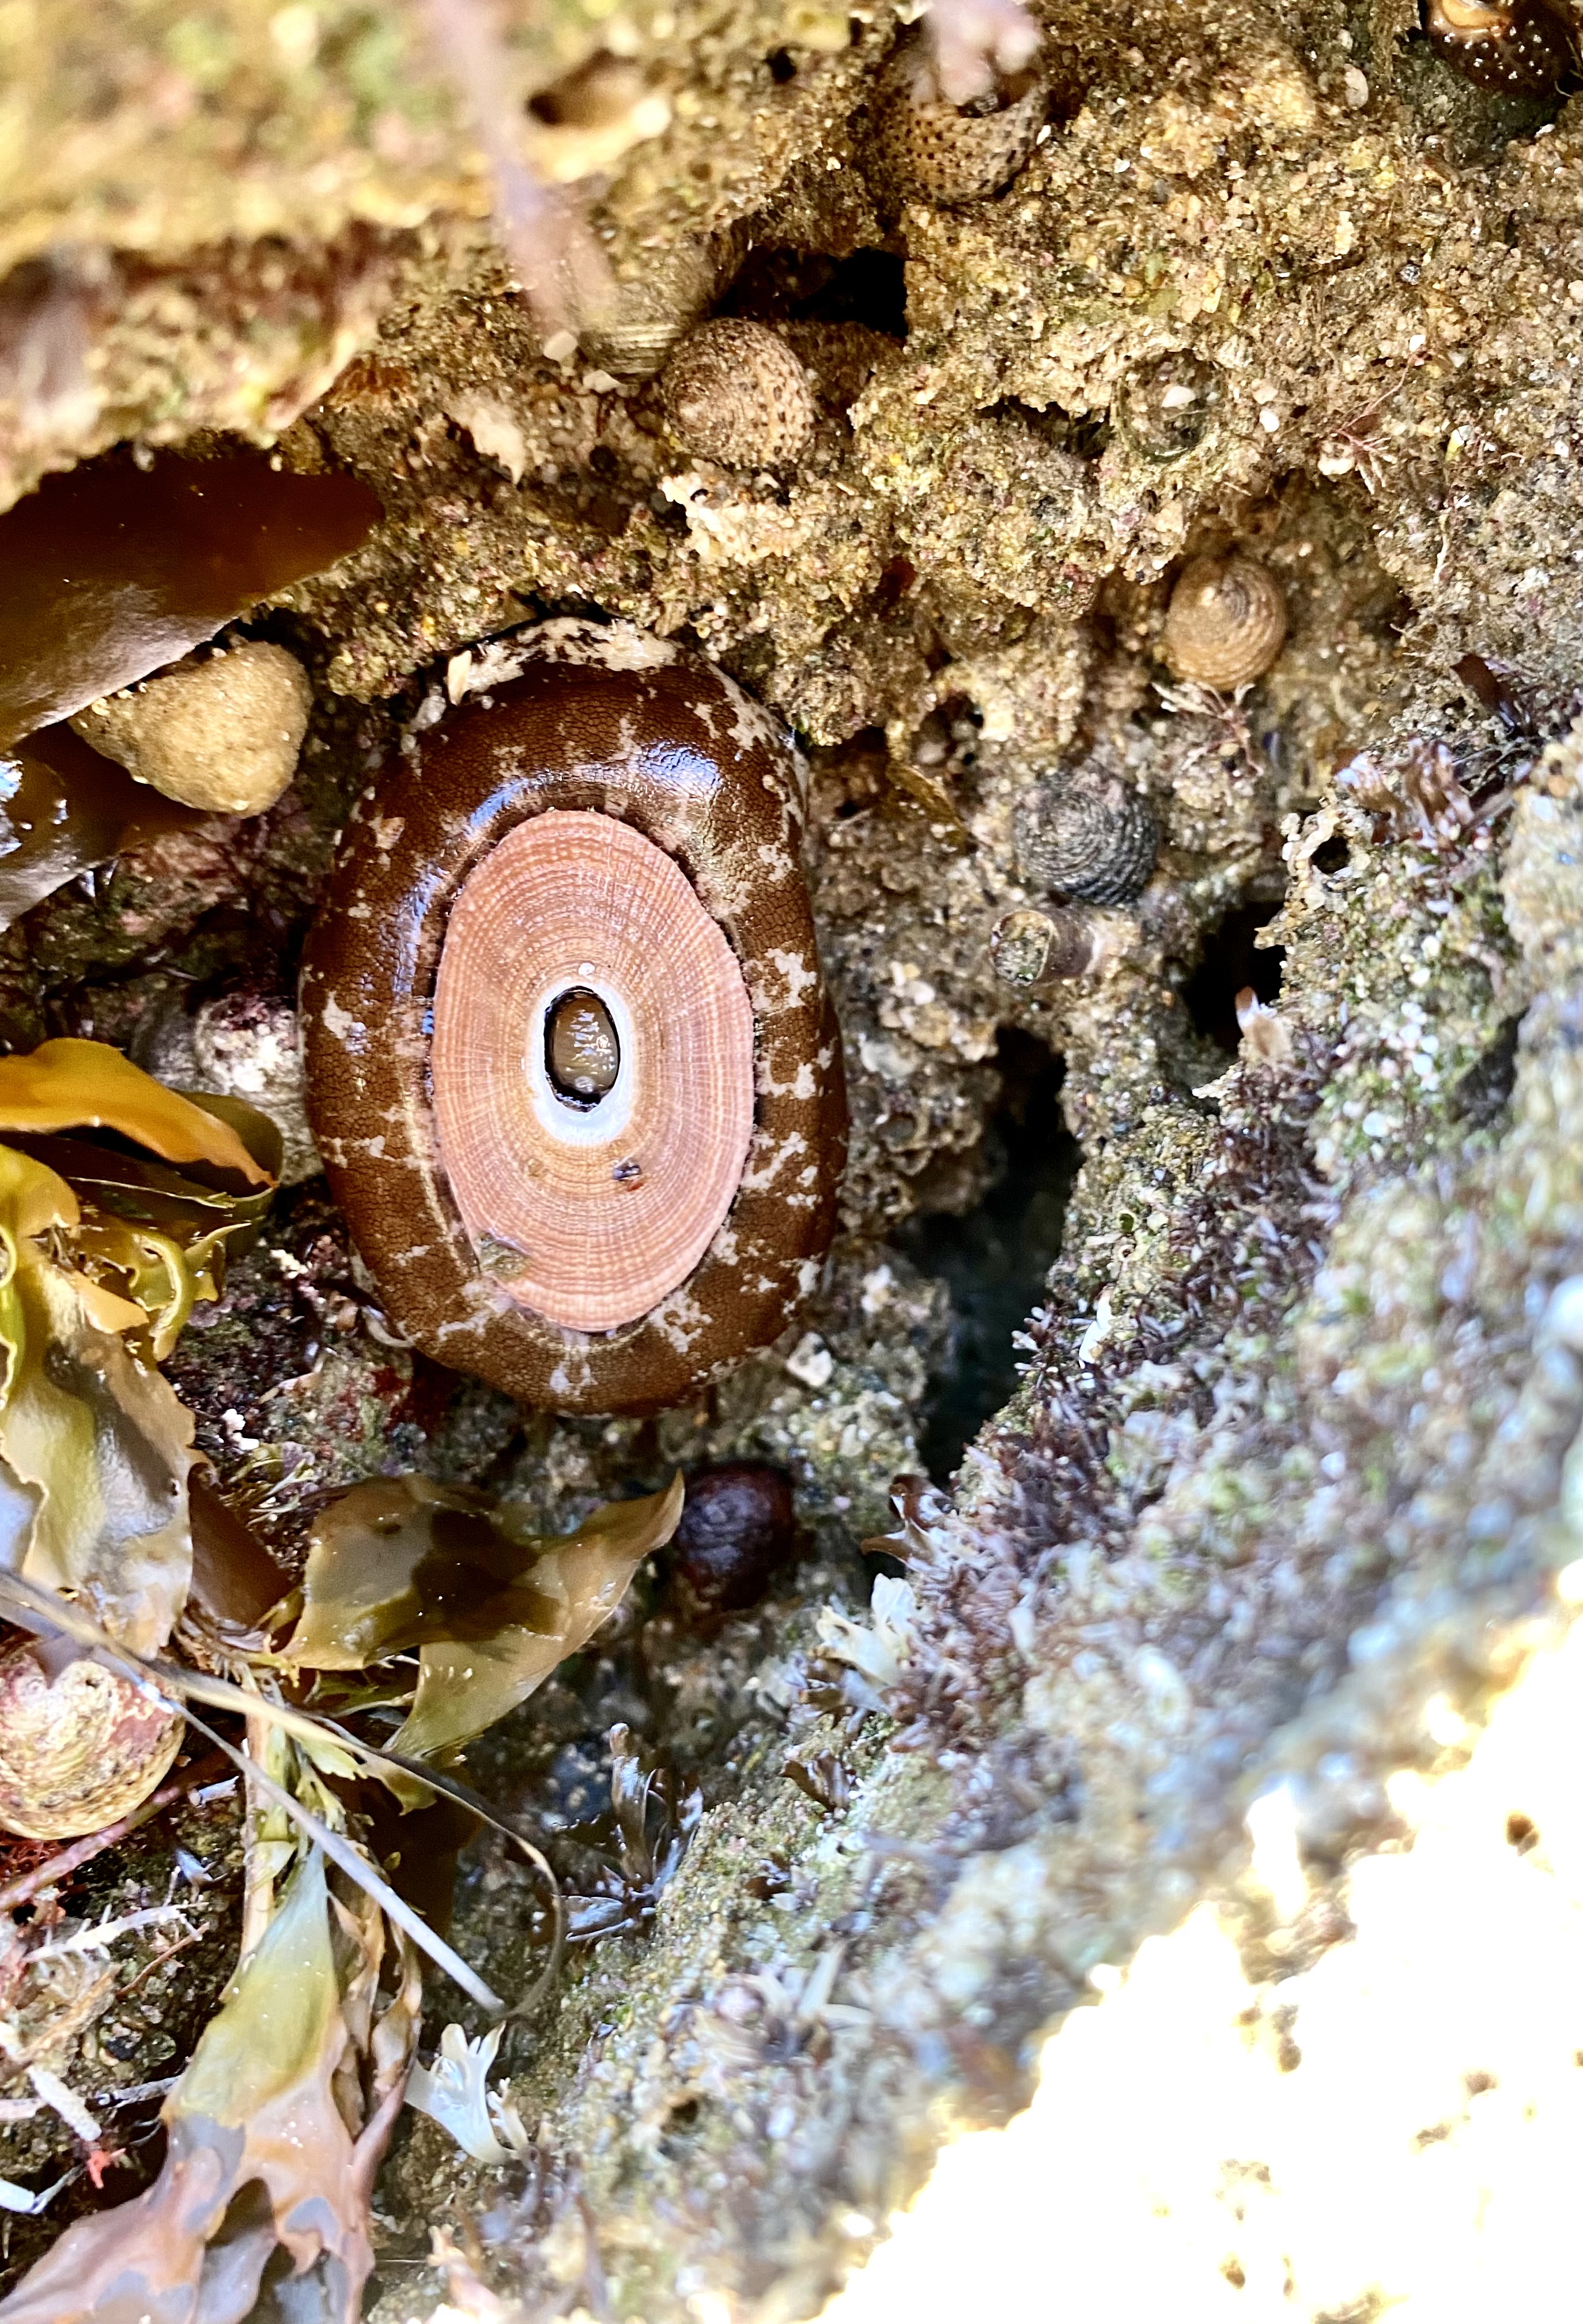
Here is another example of getting close to tide pool life to achieve an artistic photo. Getting on the same plane with your subject can take your photos from identifiable animals to works of art.
3. Find the Big and Colorful
On the subject of small animals, find the big ones! If you’re taking photos with your smart phone camera, chances aren’t good for getting fantastic macro images, so generally stick to the big stuff. Colorful images are also great for smart phone tide pool photography. Much of the tide pools is green, brown, and gray, so finding an orange or purple sea star makes for some great photos.
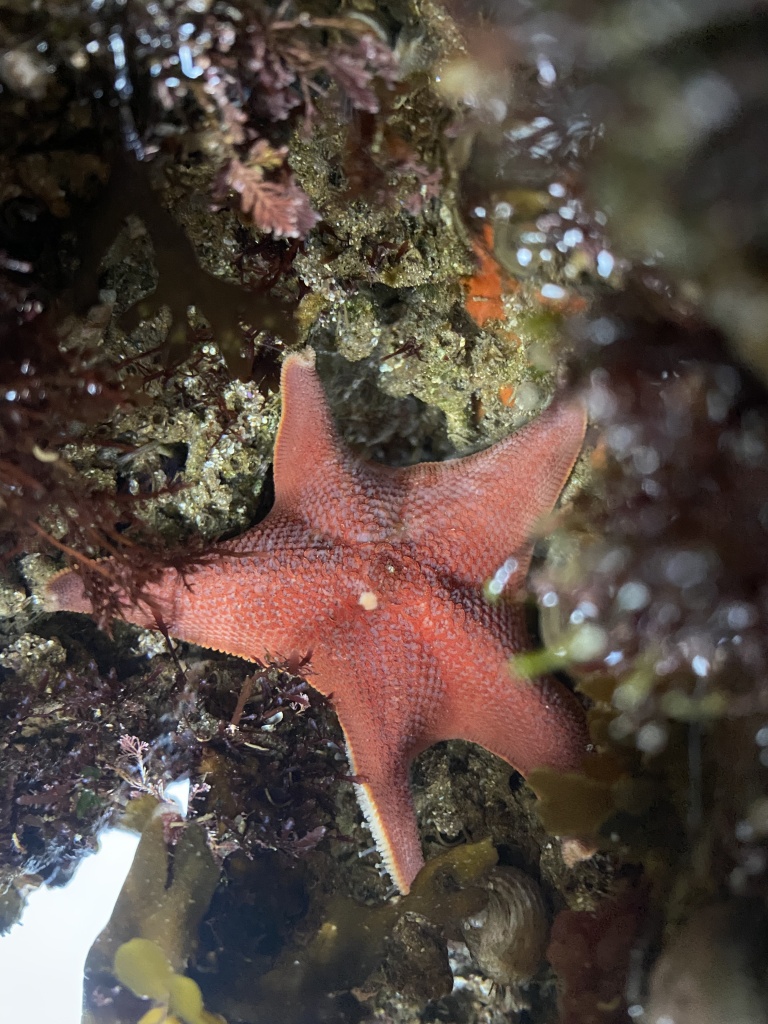
This bat star (Patiria miniata) I found tucked beneath a rock is an excellent subject because of its bright colors and large size. This photo was shot on iPhone 11 Pro.
Other large animals like birds, seals, and sea lions also make for eye-catching photos. Make sure not to get too close to these animals, however, as you don’t want to disturb them.
4. Put Your Phone Underwater (if you’re willing…)
Most smart phones today are water proof, meaning you can put your phone underwater to take pictures. Some people are not willing to do this and understandably so; your phone is very expensive and has tons of important data on it you don’t want to loose if it breaks, even though the waterproofing is guaranteed up to a certain depth.
However if you want to break into avid tide pooling and photography but don’t want to take the leap to buy and underwater camera yet, using your phone underwater is a great option. The photos aren’t adversely impacted by the water and you will be able to get much closer for those smaller tide pool animals.

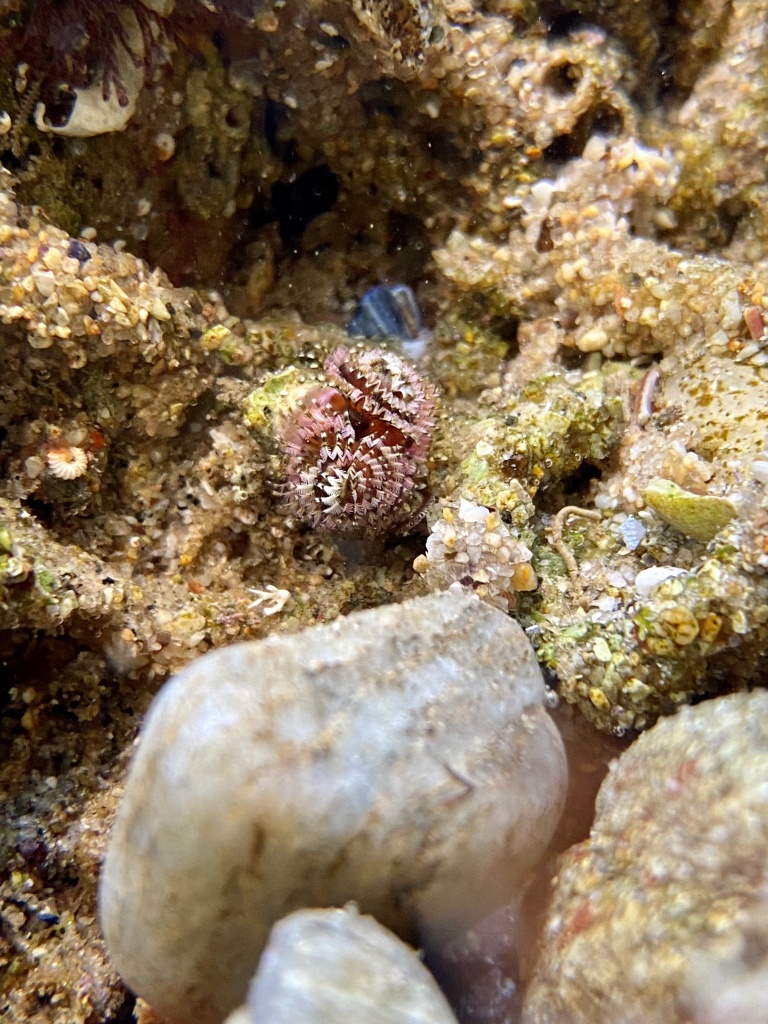
Both of the images above of a tiny Panamic Christmas tree worm (Spirobranchus spinosus) were take with my iPhone 11 Pro. This Christmas tree worm was no more than a centimeter across, if that. The left image is from above the water, and you can barely see the it just to the right of the small red and gray pebbles. On the other hand, the image on the right was taken from underwater with my lens close to the animal.
It can often help to put your phone in the water upside down so that the lens is close to substrate. Getting at “eye-level” (even if your subject doesn’t have eyes), can make for a better shot. Plus, when your phone is underwater, you no longer have to fight with the glare.
It’s also important to remember that smart phones have fairly good resolution and you can crop your photos without losing too much sharpness. It’s almost always better to let your camera focus and crop your image later than loose sharpness by being too close.
Always rinse your phone with fresh water after having it in ocean as the salt can leave residue when the water has evaporated. If you suspect water damage, the old box of rice trick really does work.
5. Do Some Editing
You’ve done all you could to get those images at the tide pools even if you are shooting on your phone, but maybe they just didn’t turn out as vibrant as you would have liked. Lucky for you, smart phones also have simple, easy-to-use, built in editing softwares that can really add some pop to your photos.

Editing on your phone is one of the best ways to improve your tide pool photography. The image on the left is not that great, but with a little cropping and editing, it turned into the image on the right.
First, you’ll want to crop your image to make the subject really stand out. Then you can use the auto editing tool or play around with the settings yourself. You should also have some options that you’ll have to adjust manually like sharpness, noise reduction, and warmth. Have fun with it and see what you can do with this simply software.
Ultimately, taking photos at the tide pools with your smart phone is great way to practice your photography or to simply document your outing. With a little help, you can take stunning photos without the big camera and expensive equipment (although that does help). Keep your eye out for the other installments of this series where I’ll talk about tide pool photography with underwater cameras and DSLRs. Happy tide pooling!

Categories
tags
Subscribe to the blog
Sign up to receive weekly emails with tide pooling information and guides so you never miss a post!

Leave a comment